Firewall
Overview
The Firewall page allows administrators to configure network access rules for the G-Immute system. You can add firewall rules to allow specific IP addresses and ports, enable or disable the firewall, reset rules to default, and reload the configuration. When the firewall is enabled, only traffic matching the defined rules is permitted.
To access the Firewall page, click on FIREWALL from the left navigation menu.
Adding a Firewall Rule
Click the + Add Firewall Rule button to open the rule configuration dialog.
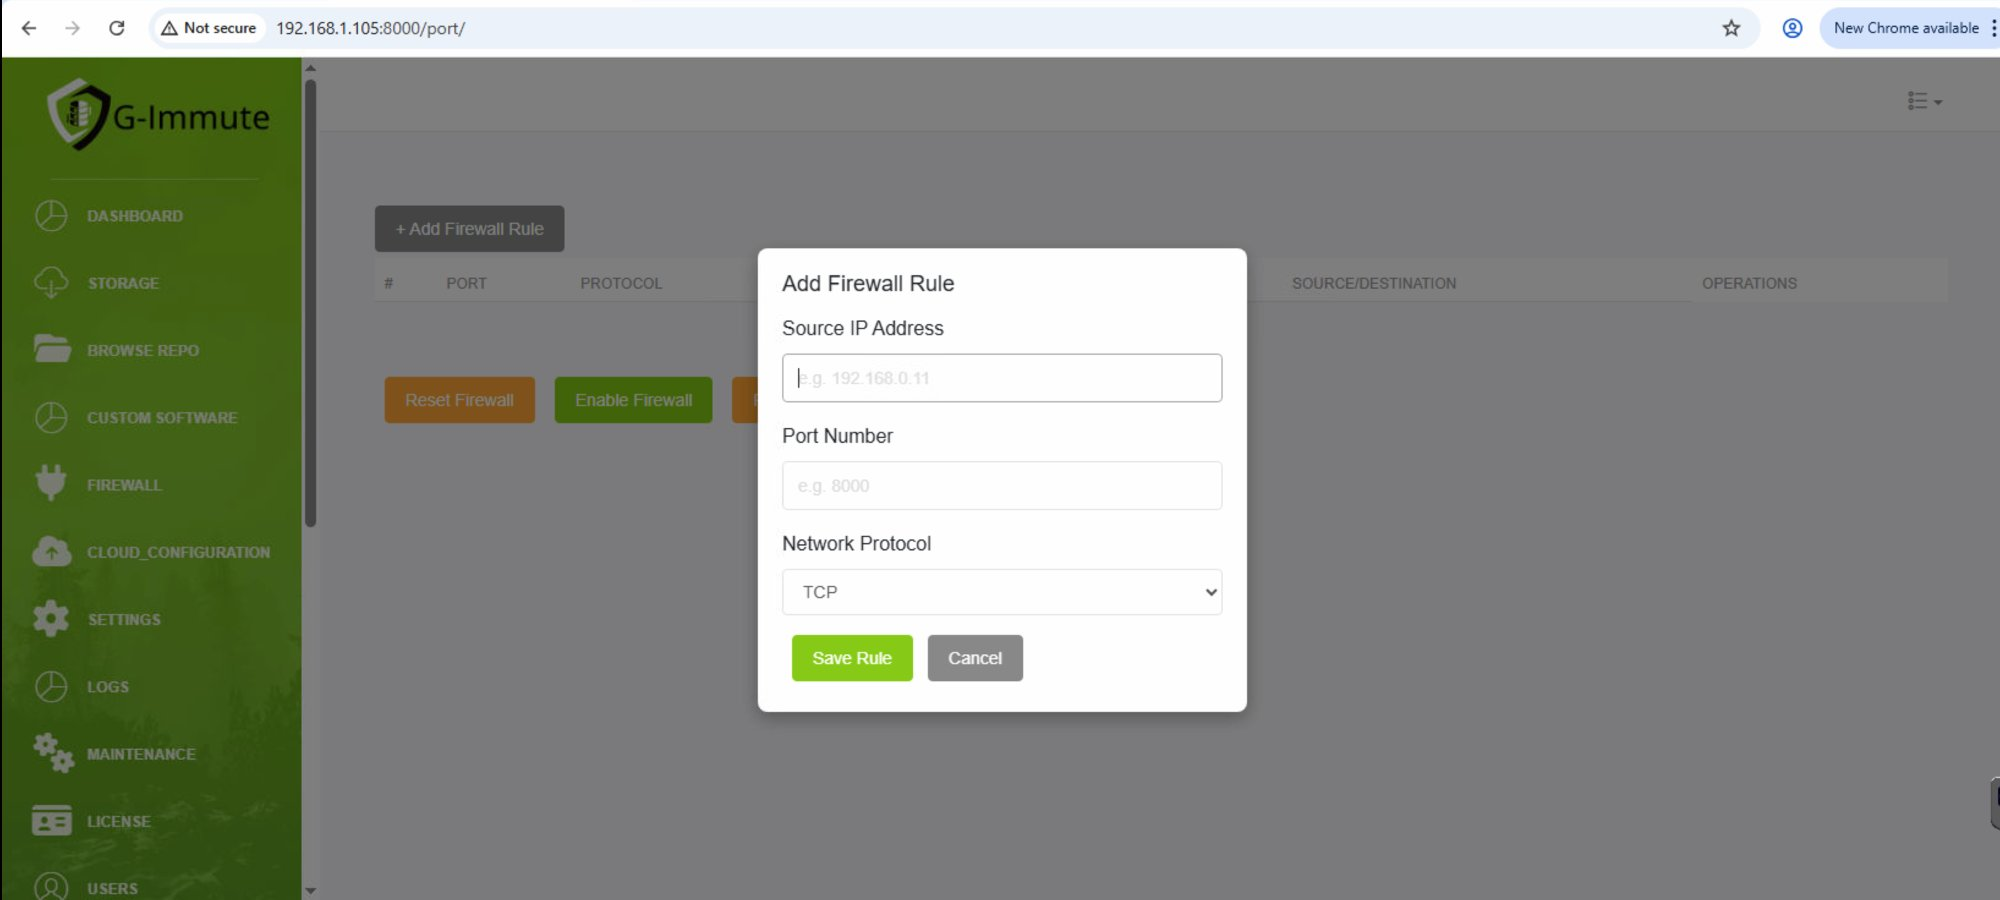
Figure 50 — Add Firewall Rule dialog
| Element | Description |
|---|---|
| + Add Firewall Rule button | Opens the Add Firewall Rule dialog to create a new inbound access rule. |
| Source IP Address | Enter the IP address that should be allowed access. Example: 192.168.0.11. Leave blank to allow from Anywhere. |
| Port Number | Enter the port number to allow. Example: 8000, 22, 445. |
| Network Protocol | Select the network protocol for this rule. Options: TCP or UDP. Default: TCP. |
| Save Rule button (Green) | Click to save and apply the firewall rule immediately. |
| Cancel button | Click to close the dialog without saving any changes. |
Firewall Rule Saved — Confirmation
After clicking Save Rule, a confirmation popup appears confirming the rule was applied.
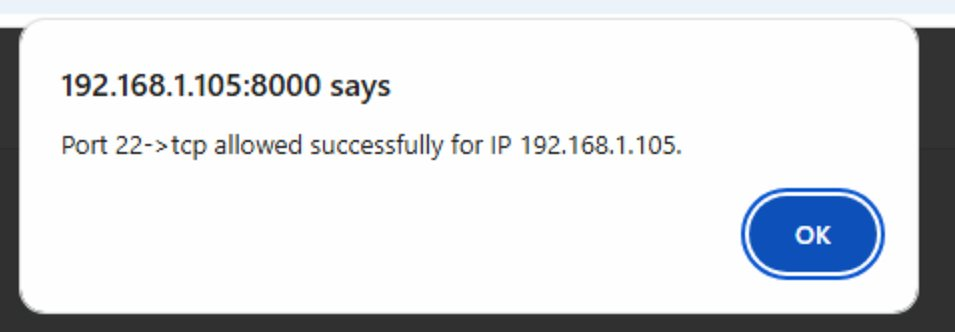
Figure 51 — Firewall rule saved confirmation
| Element | Description |
|---|---|
| Message shown | "Port 22->tcp allowed successfully for IP 192.168.1.105." — confirms the firewall rule has been created and is now active. |
| OK button | Click OK to dismiss the dialog. The rule will appear in the firewall rules table. |
Firewall Control Buttons
At the bottom of the Firewall page, three control buttons manage the overall firewall state. The buttons change depending on whether the firewall is currently enabled or disabled.

Figure 52 — Firewall control buttons
| Element | Description |
|---|---|
| Reset Firewall (Orange) | Clears all configured firewall rules and resets to the default state. Use with caution as all custom rules will be removed. |
| Enable Firewall (Green) | Activates the firewall. All traffic not matching an allow rule will be blocked. Button changes to Disable Firewall when active. |
| Disable Firewall (Red) | Deactivates the firewall. All incoming traffic is allowed regardless of rules. Shown when the firewall is currently enabled. |
| Reload Firewall (Orange) | Reloads and reapplies the current firewall rules without restarting the system. Use after making rule changes to ensure they take effect. |
Firewall Rules Table — Enabled State
When the firewall is enabled, the rules table shows all configured allow rules. Each rule specifies which port, protocol, and source IP is permitted. Rules can be deleted individually using the red Delete button.
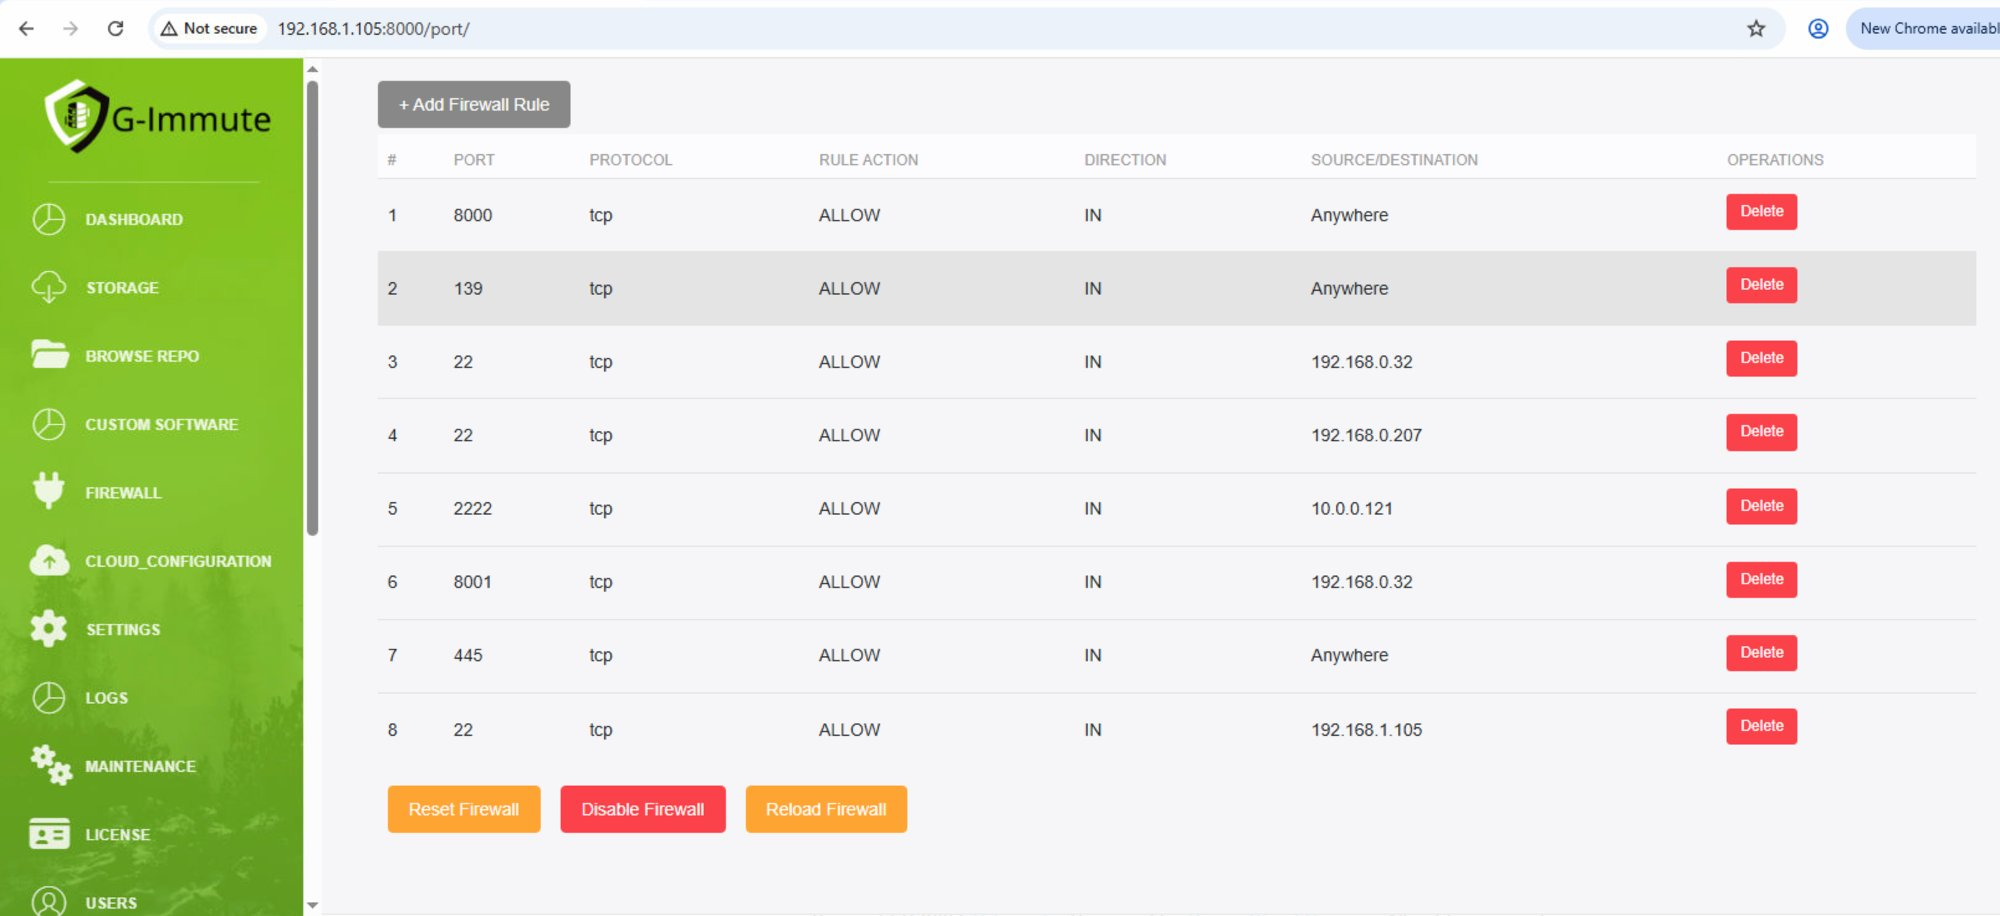
Figure 53 — Firewall rules table with active rules and Disable Firewall button
| Element | Description |
|---|---|
| # (Number) | Row number for each firewall rule. |
| PORT | The port number this rule applies to. Example: 8000, 22, 139, 445, 2222, 8001 |
| PROTOCOL | The network protocol for this rule. Example: tcp |
| RULE ACTION | The action applied to matching traffic. Example: ALLOW — permits the traffic through. |
| DIRECTION | The direction of traffic this rule applies to. Example: IN — applies to inbound connections. |
| SOURCE/DESTINATION | The IP address or range this rule applies to. Anywhere means all IPs are allowed. Specific IPs restrict access to that address only. |
| Delete button (Red) | Click to permanently remove the selected firewall rule. |
| Disable Firewall | When the firewall is active, this button appears (instead of Enable Firewall) to turn it off. |
Always review firewall rules carefully before enabling. Incorrect rules may block legitimate access to G-Immute. Use Reload Firewall after making changes to ensure rules are applied immediately.